*This post may contain affiliate links. As an Amazon Associate we earn from qualifying purchases.
While RC helicopters make a great hobby, sooner or later, you’ll run into the infamous spinning problem, known to many as the toilet bowl effect, or TBE. If you own a micro RC helicopter that has a fly bar, then you’ll probably experience the toilet bowl effect at some point. While the toilet bowl effect can feel hopeless, as long as you can identify the problem, there are plenty of fixes that can help.
How do you fix an RC helicopter that keeps spinning? You can fix an RC helicopter that keeps spinning by fixing the ball links on either or both the fly bar ball and upper rotor blade. The other fix has to do with the fly bar not pivoting correctly on the rotor shaft. To check on this, you’ll need to disconnect the fly bar and rotate the fly bar up and down.
Since there isn’t much information available on the Internet today dealing with an RC helicopter that won’t stop spinning, we decided we’d create this guide to help you out. Below we’ll discuss the toilet bowl effect with RC helicopters and how you can fix that so you can stop your RC helicopter from spinning.
To see some of the best RC helicopters that are currently available just click here.
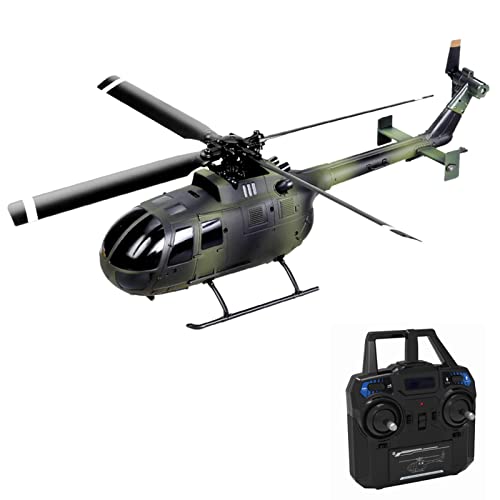
Most cheaper RC helicopters look inexpensive but this model doesn’t. It has a single blade and looks like a real helicopter unlike many of the other models.
This model doesn’t break the bank and is far cheaper than drones with similar specs.
Rotors on RC Helicopters
To understand how to handle a spinning helicopter, you’ll first need to know about the two categories of RC helicopters.
· Our first category features RC helicopters that use two main rotors that travel in opposite directions. This kind of RC helicopter will lack a tail rotor.
· The second type of RC helicopter has a tail rotor and one individual rotor. Because there is just one motor on this kind of helicopter, also known as a coaxial helicopter, the tail rotor is necessary to balance out the rotor and the tail, so the aircraft moves straight. These helicopters also feature a gyroscopic controller to help balance out the single rotor with the tail. When this system malfunctions, your helicopter will start spinning uncontrollably.
If you’ve ever experienced this problem, you know that it can be quite startling and even dangerous. Since these RC helicopters can weigh several pounds, and their blades will continue spinning, once they lose control, they can crash, or also harm somebody. If your RC helicopter starts spinning like crazy, you will need to turn it off and figure out how to fix it.
Defining TBE
If your helicopter is spinning in circles uncontrollably, then you are likely experiencing TBE. TBE is something many coaxial helicopters, or the single rotor helicopters we mentioned above, can experience. When the aircraft starts spinning, it will keep the same function without noticing what you are trying to tell it. Also, the earlier you catch TBE with your RC helicopter, the easier it is to turn it off when it’s stuck in the TBE realm.
Causes of the Toilet Bowl Effect
There are several causes for TBE, which we will cover in more detail below. The coaxial RC helicopters can be caused by a gyroscopic problem with a rotor, a rotor imbalance, overly tight blade grips, an off-balanced fly bar, or poor trim. TBE is a standard occurrence in many cheaper coaxial helicopters, and it may take some time to figure out what’s causing your RC helicopter’s problem. There are a few causes of TBE, and you won’t be able to see them with your naked eye.
Design
Unfortunately, the coaxial RC helicopter’s design, which makes these models cheaper, also means the RC helicopter will experience TBE at some point. However, the designers of these coaxial helicopters did manage to add in a few things to help absorb the shock and vibrations in the RC helicopter.
These helicopters work by using the main rotor blades to pull the aircraft into the sky. If you have made your blades too tight, then the aircraft won’t be able to pull up correctly, and you may experience TBE. That’s because the helicopter won’t be able to absorb the shock correctly anymore.
Unbalanced Blades
When a coaxial helicopter isn’t experiencing TBE, then both blades on its rotor are balanced out when the aircraft lifts. However, when you have unbalanced blades and you try to input a command into your remote with something like this that offsets the helicopter’s pitch, you won’t see TBE coming because the rotor will be moving too quickly. So, don’t feel bad if you feel like you cannot recognize TBE by looking at your helicopter without turning it on and trying to fly it. Nobody can.
When the blades are off-balance, your pitch will be out of balance as well. Usually, when an RC helicopter flies, the blade with the cyclic input uses its tip to help the rotor slow down or increase while working with the other blade. Both blades are balanced to keep the pitch evened out. If the blades aren’t even, the pitch can quickly increase the tip’s speed, and then make it drop without balancing.
The flapping action of the blades is necessary for any RC helicopter to fly. If the blades are too tight, they won’t move or flap. Another issue you’ll want to check is how tight your blades are. If they are overly tight, then that could also be the reason why your RC helicopter is experiencing TBE. Some people tell you to tighten them, but you shouldn’t do that on a micro coaxial helicopter. So, you may need to loosen or replace some screws.
The Fly Bar
In RC helicopter models that use the 45-degree fly bar, which is put on the RC helicopter to help with your remote inputs as well as balance out the aircraft, TBE is likely to happen right after you’ve crashed your RC helicopter. When your RC helicopter is fully functional, it won’t need much pressure from the servos to control the fly bar because when it tilts, it’s able to change the blade’s pitch easily. Some helicopters use a gyroscopic stabilizer on their fly bars, which self-correct the aircraft.
However, most coaxial helicopters, if they even have a gyroscopic stabilizer, it probably won’t be a top-of-the-line one. With a coaxial helicopter, your fly bar is at a 45-degree angle to your rotor. If your RC helicopter has a light rotor that is long, and your fly bar is small and dense, then it’s already at a disadvantage. Unfortunately, many coaxial helicopters are built like this because it helps keep the cost of their designs low.
When anything, and we do mean anything, pushes the fly bar, so it isn’t at a 45-degree angle to the rotor anymore (say, like a bad crash), then you’ll likely see TBE. On your fly bar, you’ll also see some links that help create movement. If your links are also off in some way, then that can also affect the way the rotor works.
Sometimes when you crash, your linkage guides can get bent. So, that’s another thing you’ll need to check on. If your links are off, then your fly bar won’t be able to move around much. Then, you’ll be more likely to experience TBE. So, if you’ve crashed your RC helicopter recently, you may need to think about purchasing another fly bar and replacing your old one. Once you do that, your helicopter should work well.
The Pitch
When the helicopter has problems with its fly bar, it starts pitching backward. Since the fly bar will again be late with the self-correction process and won’t help with the backward pitch. Instead, the fly bar will change the pitch on the rotors, and tell the helicopter to make a left roll. You can probably now start recognizing what is going on. Your RC helicopter won’t ever stabilize again well during the flight if the fly bar keeps reacting too late. Then, you’ll wind up with the toilet bowl effect.
Unfortunately, the stiffer your fly bar, then the more off the correction will be, and the larger and more prominent your toilet bowl circle will appear. When there is a lag in the rotor pitch change like this, your counterclockwise upper rotor, which is the most common type of rotor that you’ll find on micro coaxials, will start a clockwise toilet bowl effect issue. However, if the upper rotor circles clockwise, then the TBE would create a counterclockwise circle.
We understand that describing the way the toilet bowl effect works is a bit dry and complicated. However, if you think about it, you can see how much planning and physics that goes behind the design of a small micro coaxial RC helicopter. Taking that into consideration means we’ve got some pretty fantastic RC helicopters around nowadays.
Another reason why you might have a fly bar that’s slow to respond has to do with a stiff or binding upper blade pivot. If the blades aren’t pivoting on the headpins, you’ll wind up creating the same problem as a binding fly bar, which is the toilet bowl effect.
Now that you know how the toilet bowl effect works and what causes the toilet bowl effect, we’ll move onto discuss how to fix the toilet bowl effect.
Adjust Your Trim
Another item that could be creating your TBE problem is your trim. You’ll also want to make sure you adjust the trim. We’ll tell you how you can fix this as well as your other TBE problems below.
Fixing the Toilet Bowl Effect
As we mentioned above, there are a few reasons why your coaxial RC helicopter could be experiencing TBE. To help you fix your TBE problem, we’ll cover the solutions to each issue. You may have to try several fixes before you find the right one, but be patient. We promise you your RC helicopter is definitely worth the time and effort because you’ll have so much fun once you get back to flying!
#1: Assess Your Tail Rotors
You’ll need to take a close look at your tail rotors. First, check to see that everything looks connected. Without the proper pitch on your tail rotor blades, your RC helicopter won’t be able to stop or pause. With the pitch off on your tail rotor, your RC helicopter can quickly spin into circles without pausing. If your tail rotor blades look incorrect, then you should grab an angle measurement tool, and carefully bring the tail rotor back to the right place.
You also need to look at your tail rotor to make sure it still seems to be robust and responds well to commands. Since you likely have a brushed motor with your coaxial RC helicopter, then you have an engine that will wear out much more quickly than an unbrushed motor. So, worst case, you’ll need to purchase another motor and replace it to make the RC helicopter fly steadily again.
#2 Check Your Fly Bar
So, you want to make sure your fly bar can pivot freely. So, if you blow down on the fly bar as if you were to blow out a candle, your fly bar should move. Additionally, think about giving the fly bar tap to see if it will pivot down. You want to make sure it can bounce up and down successfully one time and pivot in the head.
So, you wil want your fly bar to feel slightly free in the rotor shaft area to make sure the fly bar can move freely. If your fly bar feels tight, then you’ll want to grab some 400-600 grit sandpaper, and sand the plastic pivot points on the fly bar, or inside the fly bar’s head (wherever they are located on your model of RC helicopter).
Another great thing to do is to add some silicone spray before you put your helicopter back together. That way, the parts on your helicopter can remain flexible enough to avoid the issue in the future. Avoid using products that are heavy or use petroleum as a base, like WD-40, for example. Using a petroleum spray isn’t a great idea because it will attract dirt to your RC helicopter, and cause even more issues for you. So, if you don’t currently have silicone spray on you, don’t worry about using a spray, and skip this step.
#3 Bent Linkage
If your linkages are bent, there’s a quick and easy fix for that. Fixing the linkages will also help balance out TBE. After you take off your linkages, grab a cigarette lighter and lightly touch the flame to the white piece of plastic linkage that is bent. You might need to contact the fire to it again, and as you do, straighten the guide until it lines up correctly. The linkages can soften after this process, so make sure you keep them straight until they cool off.
By using this method, your linkages will be stronger and less likely to bend. However, if you do this frequently, the linkages will get weak, and you’ll have to replace them. Also, as you are using your lighter, never, ever warm up your blade grips or any part of your helicopter.
#4 Check Your Ball Links
As you check your fly bar, you’ll also need to check on your ball links. Earlier, we mentioned that a stiff ball links a be a significant factor in creating the toilet bowl effect because the rigid ball links make your fly bar far less flexible. For this reason, most RC helicopters have only one ball link rod on one side, and not on both sides of the aircraft. If you had one on each side, you’d have two more ball links you wouldn’t need adding to the inflexibility of your fly bar.
If your ball links do feel stiff, there is a reason for this. During the molding process, a seam is created on the ball link, and that seam, after some use, starts wearing down and stiffening. To fix this problem, grab your 400-600 grit sandpaper and start lightly sanding the link balls on your fly bar. You will also, sand the link ball found on your rotor blade. You want to make sure you’ve fixed all ridges or other issues that could be creating a tight fit with your ball links. Once you are done, put your links over the balls, and assess.
To assess your ball links, make sure your link moves quickly on the ball. Ensure that gravity can link turn on the ball. You’ll know that you’ve got it right when your link feels like it’s loose over the ball. However, keep in mind, this fix is for micro RC helicopters only. If you use larger single-rotor helicopters, then you want tight ball links.
#5 Check Your Trim
One way to do this is by taking your helicopter up into the sky, then trim your remote the other way to make the helicopter move. You can continue to do that until your helicopter stops drifting. Then, you will have adjusted out your trim once you are done.
#6 Upper Blade Pivots
Now, the last part of your RC helicopter to check is your upper blade pivots. You want to make sure they move quickly on the headpins. One of the main reasons you’ll have a problem with your high blade pivots is a piece of hair or debris sitting between the head and the blade. That creates binding and tightness. Remember, a residue can build on your pins since the pins lubricate and attract dust. So, grab some alcohol and clean those pins.
You also need to get some Q-tips and then wet them with alcohol. Once you’ve done that, you can get in there to wipe off those upper headpins. You will probably need several Q-tips because you’ll notice a ton of dirt and grease that will come off of your pins.
If you haven’t been doing this regularly on your coaxial, then now is the time to start. While you are cleaning, you should also hit the lower headpins if you own a coaxial to keep everything smooth and easy. Once you are done, spray it with some silicone spray, and put everything back together.
Here is a video for the visual learners who don’t like to read. I know I am in that group.
Final Thoughts
You are officially all done! Your toilet bowl effect problem should be fixed. Your next step is to take your helicopter out for a test ride. If you still see some TBE issues happening, then something is still not flexible. So, you may need to go over the steps again. However, once you do that, you’ll probably have your helicopter flying freely through the air back, as nature intended.