*This post may contain affiliate links. As an Amazon Associate we earn from qualifying purchases.
You have now purchased your very own radio-controlled car! Maybe it came in a kit, and you built from the given parts. Now it is sitting there in front of you, and it is now your canvas. You can do with it as you wish.
So, you have to decide what type of paint to apply to this radio-controlled car (because, as we all know, paint color is important—especially to onlookers).
Which paint is the best type for RC car bodies (spray paint, brush-applied, acrylic, enamel, etc.)?
Normally, acrylic or enamel paints will do the best paint job for your RC car. However, there are also several other different options you may wish to explore, and there are many different brands to use, though the most reliable are Duratrax, Tamiya, and Pactra.
Most paints also do not stick to the material that makes up RC car bodies, so you will have to use specific paints to paint the RC car body (these are typically sold in hobby shops dedicated to radio-controlled cars) or available for purchase online.
To see the most popular RC cars and accessories currently on the market just click here.
If you love RC Trucks then you will love the 2WD or 4WD Traxxas Slash!
With a top speed of over 60 mph, you will love driving this RC vehicle!
Which Types of Paint Work Best?
When it comes to types of paint, I’m actually going to discuss specific paint brands that work well when painting RC car bodies. The ones in consideration have acrylic, enamel, and lacquer options, and the following brands are reliably ranked among the best for radio-controlled vehicle painting.
1. Duratrax
Duratrax is available in 38 colors, according to their website. They tout their product as a durable paint that provides “excellent coverage and spray patterns.” Their paint is specially formulated for polycarbonate RC car bodies (such as Lexan).
Duratrax also markets that they have larger can sizes, containing 4.5 oz of paint. Duratrax also offers smaller half-an-ounce size bottles of paint.
They sell their paint per ounce.
You can see the current price for this paint by clicking here.
2. Tamiya
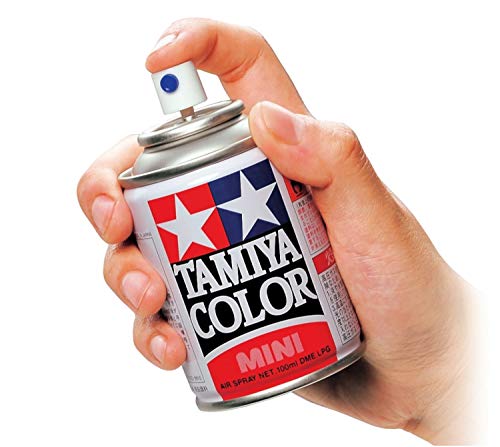
Tamiya sports three different types of spray paint, a TS, a PS, and an AS:
- TS: Great for large surfaces. It is a “synthetic lacquer” paint. Each bottle of TS contains 100 mL of paint (enough to cover 2-3 1/24 scale-size) RC car bodies. This TS Tamiya spray paint will not be affected by acrylic or enamel paints, so it serves as a great base coat on top of which an acrylic or enamel paint can be added for detail.
- PS: These are used to decorate transparent polycarbonate (Lexan) RC car bodies. Each bottle also contains 100 ML of paint. You’ll normally need to apply two coats of this paint. Do NOT use these paints on plastic models!
- AS: These do not apply to RC car bodies; they are specifically manufactured for aircraft models.
To see the current prices for the Tamiya RC paint just click here.
3. Testors Pactra
Testors Pactra’s lacquer spray paint creates durable, flexible finishes that can withstand “the extreme demands of R/C racing.”
Their lacquer paints are specifically manufactured and concocted so that they can be painted onto polycarbonate surfaces.
Their paints come in a variety of colors.
Acrylic, Enamel, And Lacquer Paints for RC Bodies
There are a plethora of ways you could go about painting your RC car model: brushing on paint, airbrushing it, or a quick, easy spray paint. However, many people, when they paint their new RC car will typically use a combination of different methods. These methods can vary depending on which part of the car is currently being painted.
While there is not much information on lacquer paints, many major paint brands (such as Tamiya, Pactra, and Duratrax) offer lacquer paint that was specifically manufactured for use on Lexan and polycarbonate bodies for RC cars.
Enamel Or Acrylic Paint
For an overall paint job on the RC body, you should consider using enamel or acrylic paints as they tend to provide the best end result for most users. Both paint types bond well to the materials used to construct RC cars such as Lexan, metal, fiberglass, carbon fiber, and more.
Acrylics, though, do tend to dry faster than their enamel counterparts which makes them a popular choice. Acrylics are also easy to thin and do not emit toxic fumes.
Enamel paints, on the other hand, take significantly longer to dry than acrylic paints and do, in fact, emit dangerous toxic fumes. However, no matter how enamel coats are painted on—even if they are brushed on—they will normally show a smooth, clean finish to the car body.
If your car body is constructed of Lexan (a polycarbonate plastic), it is best to use enamel or acrylic paints. However, that is not to say that other good paint jobs cannot be made with other methods or other paint types.
Spray Painting Method
It is always a good idea to mask your car properly. Masking certain parts of your car can be difficult especially if you are going to use different paint colors on different areas. The last thing you want on your new RC car is the paint job to look horrible! I will discuss some more specifics for proper masking below.
- If you are painting a Lexan RC car body, then a normal spray paint won’t do as they don’t adhere well to polycarbonate material. Instead, you’ll need to use paint especially formulated for polycarbonate material, so you should use Pactra, which is commonly sold in hobby shops or purchased online.
- On the other hand, if you are painting an ABS or styrene hard body, then a regular spray paint should be fine. It may behoove you to purchase a specific enamel spray paint as they will often have a better finish.
For a thorough painting job and a good finish, the surface must be prepared. Preparation really is the key to having an amazing looking paint job. Preparation includes washing the body of the radio-controlled car so as to remove any lingering dirt, oil, smudges, fingerprints, etc.
If you don’t properly clean the body, the paint won’t adhere properly to the surface and might also show the dirt and blemishes that weren’t removed. Often cleaning will only require some warm soap and water and a dry lint free cloth.
After your vehicle is fully cleaned and all of the dirt and debris is removed you can then begin masking the vehicle.
Masking Methods For RC Cars
There are a variety of methods that one can undertake to mask any specific area on an RC car for painting.
- Regular, low-tack masking tape is the go to option for many hobbyists, but it certainly isn’t the only option available.
- You could also use a liquid mask, as it works well for compound curves or more complex designs. Then, for small areas or to add stripes to the finish, you could use a thin vinyl masking tape.
- You could also use frisket film, which is a small shelf paper with an adhesive. Frisket film is commonly used when airbrushing and uses a clear, acetate film with an adhesive backing. However, it is not advised to use frisket film with solvent based paints, according to Airbrush Guru.
Take care that your adhesive masking method does not attract any other trace of dirt, dust, or loose particle as this would require you to go back a step and reclean. Ideally you will do your cleaning, prep, and painting in a place with not much wind or dust.
Now, when you apply your masking method, you may need to cut away any excess tape to ensure that the paint job will look as you want it to when it’s done. Use a #11 blade (refer to Swann-Morton for pictures and more detail), which is basically a fine, thin blade perfect for clean finishes. You can use a larger blade but be sure that you don’t score the body of your RC car while attempting to cut the masking.
When you are finished cutting away the excess tape, or whatever method you used, you can then peel away whatever is left over.
You can then proceed to spray paint the car body or begin whatever method of painting you are using. Again, it is best to be in an area that is large enough that the fumes won’t hurt you but also you don’t want to be doing it outside as the wind, bugs, or debris can easily ruin all of your hard work.
The Airbrush Method
Using an airbrush allows for precision and control, much more than a spray paint can could offer, especially over the amount of paint emitted and the size of the spray.
This added precision allows for more flexibility when it comes to custom designs, effects, or aesthetics.
Now, following the masking steps outlined in the spray paint section, simply cover the areas you wish to cover to help aid you in making your design, and get to painting.
It’s vital that the masking is attached properly as you don’t want it to be blown off by your airbrush. You certainly don’t want your paint lines to be all over the place because the masking tape blew up during the painting process.
Brush-Applied Paint
Now, you could, like in other painting circumstances, use a paint brush to apply paint to the desired areas. However, when it comes to brush-applied paint, you are likely to lose precision as it is difficult to control.
You should consider reserving brush-applied paints for the more detailed work, as this can be very time consuming and also quite monotonous for longer, more spacious expanses of painting if you are using a tiny brush.
You can also just use larger brushes to paint the entire body of the vehicle and then a much smaller brush to add in the details. You certainly can’t use a normal sized brush that you would use to paint the walls in your house but you don’t have to use the smallest brush available either.
If you have done a proper masking job then brushing with a larger brush will allow you to paint different colors easier while also ensuring that the masking tape doesn’t blow off since there isn’t any air being blown with a paint brush.
Use the smallest brush possible for any detail work or to paint the smaller parts of your vehicle.
Tips for Painting RC Car Bodies
The paint is only one part of the equation when you’re looking to get a smooth paint job on your RC car. Learning how to do the paint job and getting experience with it is just as (if not more) important. Here are some tips to make sure your paint job comes out like a pro:
Scuff the area for better paint adhesion
While you can certainly apply paint directly to smooth plastic, it may be easier if you scuff off the gloss to allow better adhesion. Scuffing the surface creates an easier surface onto which the paint can grab as the process forms a “tooth and valley” on the plastic.
When you scuff a Lexan body, using a Scotch-Brite pad to do the job is best because it is flexible and conforms to the different surfaces within the body of the car.
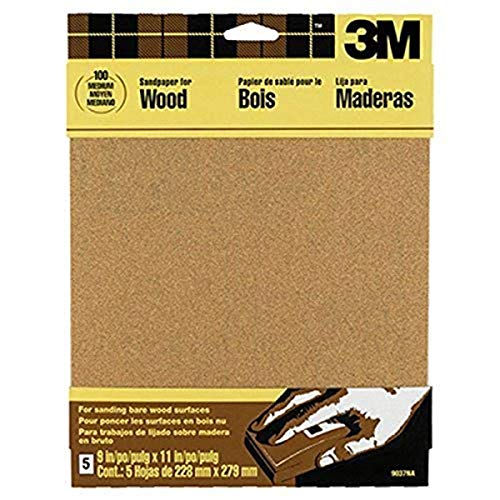
While you can also use a Scotch-Brite pad on an injection-molded body (basically a model), you can also scuff the surface with sandpaper.
However, it is important to remember that when scuffing either body, you should stop when the surface is uniform and dull.
Be sure not to use any powered sanding tools as they can easily dig too deep and damage the look of the vehicle or even damaged the integrity of the piece.
Warming the Paint Can to Improve Flow
After shaking the paint can thoroughly, you can fill a plastic container or something in which to set the paint can with hot water. You don’t want the water to be boiling hot but just some warmth to it from the tap should be warm enough.
Place the can in this water for around ten minutes. If the water cools quickly within that ten minutes, replace it with more hot water to ensure that the heat will infiltrate the paint.
The act of warming the paint allows an increase of pressure within the can that thins out the paint for an improved finish. This act of warming the paint also accelerates the time to dry, significantly decreasing the wait before doing a second coat or starting on the details.
Use Good Masking Tape
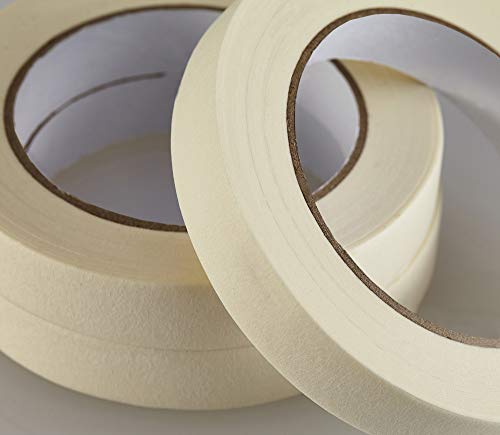
Now, when using “masking tape” refer to the sections above, as it is not recommended that you use regular, beige masking tape on RC car bodies, as this type of tape is likely to leave behind an adhesive residue. Also, the edges of the regular beige masking tape aren’t very sharp so it may be difficult to peel it off without damaging your paint job.
Tapes that are specifically created for masking will not leave behind adhesive residue and are typically quite easy to peel as they have sharper edges that aid in getting clean lines for your painting job.
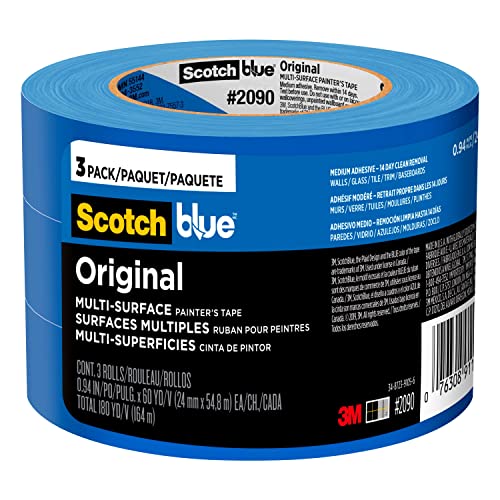
CarAction recommends using 3M/ScotchBlue and FrogTape (green-colored), as they are both good choices and relatively easy to find in hobby stores. However, these are not sold in widths smaller than one inch. That can make these great options for the larger portion of your masking but not ideal for the detailed portions.
For more fine masking, you’ll need to go to a hobby store dedicated to radio-controlled vehicles. There you should be able to find tapes as narrow as 1/16th inch for more precise masking.
Make Sure the Tape Is Dirt Free
If you decide to purchase a premium tape from a hobby store, you should do your best to ensure that you keep the tape clean.
If you put the tape down, make sure you have done so on a clean surface without dirt, dust, lint, grit, etc. If you’re not careful, the side of your tape will attract pollutants that will stick to the side of the tape and make your paint lines less precise, or even allow paint to seep underneath.
It is a great idea to consider keeping your tape in a ziplock bag as that will help protect your tape/masking material from any pollutants that could potentially contaminate it.
Some people feel that this is a little extreme but the lines on your vehicle will be the most noticeable part of your paint job.
Seal The Masking With A Coat Of Paint
Applying “two light mist coats” before fully painting the body will help make sure that the edges of the masks are sealed tightly. Even if the edges are not as well sealed as we would like, any bleeding will be minimal due to your efforts of sealing with paint.
Let the paint used to seal the masks dry so you can check to ensure full sealing before you continue to apply a full coat of paint on the body of the RC car.
You can do the sealing with a clear paint to ensure that the colored paint doesn’t seep through or you can also use the color of the base for sealing the masking.
Spray Body Smoothly
After you have shaken the can of paint thoroughly, you can proceed to paint. You should hold the paint can eight to ten inches away from the body of the vehicle.
You should spray in smooth strokes across the body of the RC vehicle. For the most thorough and even paint coverage, you should start spraying ahead of the area you intend to paint and stop after you’ve passed it. If you start on the area that you intend to paint you will often have an uneven spray which can look bad.
Brushes Are Great For Hard To Reach Spots
While every RC car body differs, your car may have spots that are more difficult to reach. Along with that, it may be difficult, especially for spray paint, to reach into these crevices.
To ensure that your paint job fully encapsulates your vehicle, you may need to use a paintbrush. You can use the spray paint to spray the paint itself into the can’s cap. Then, you can dip a paintbrush into the cap and use the brush to apply paint to the spots you were incapable of reaching with the normal spray.
This may also be a great way to touch up bodies that have already been spray painted. Also, you will not have to worry about buying a color for your paintbrush that will be different from the color of your spray paint. You certainly don’t want to have two different shades of the same color on different parts of the vehicle.
Clean The Spray Can’s Nozzle To Prevent Any Clogging
After you have finished spraying a color or painting the body of your RC vehicle, you should wipe the tip of the nozzle so that the paint doesn’t congeal there. If the paint were to dry and clog the tip, this could alter the spray pattern the next time you paint or touch up your vehicle.
To ensure that the nozzle is completely clear, you should turn the paint can upside down and spray until the paint stops coming out and only the air is. This process of clearing out the nozzle will normally only take a couple of seconds before the paint stops and it changes to just air coming out. Once the paint stops then it is safe to stop spraying.
Watch How
If after reading this article you are still a little bit apprehensive on how it will turn out you can watch a couple videos below to see exactly how they did it!
Watching someone else should help you make less mistakes as well as give you more confidence in how it is done!
Conclusion
Painting your RC vehicle can be quite a time consuming process but it not only allows you to personalize your vehicle but will also allow you to have a certain pride every time you use your car. Taking the time to do a good quality paint job will pay off for many years in the future as if done right, repainting won’t need done for a long time.
